How to Create those Dreamy Pre-Wedding Portraits
A genuine connection or expression, Beautiful light and a story—these are the 3 things I strive to have in my images. Even the most ordinary scene can be transformed into something magical when infused with vibrant colors, stunning natural light, and a truthful connection with your subject.

The very first step to being a good photographer is learning to see light. It is, after all, the most important part of photography. As photographers we chase after beautiful golden hour light however as professionals we need to learn to work with available natural light (could be harsh mid-day sun, dim evening light etc.) and supplement it with the available tools to create the desired mood. It is very important to master it as natural light changes every day (even within the same day lighting changes drastically) and every season. This also gives an opportunity to create something new, something different.

One of our favorite techniques while making portraits in natural light for our couples is back-lit photography. It creates a romantic and dreamy effect with beautiful warm tones in the image. Mastering the technique may take time, but the efforts will be worth it once you get it right.
Here are a few tips that will help you master those perfect back-lit portraits.
Use the Sun to create a flare
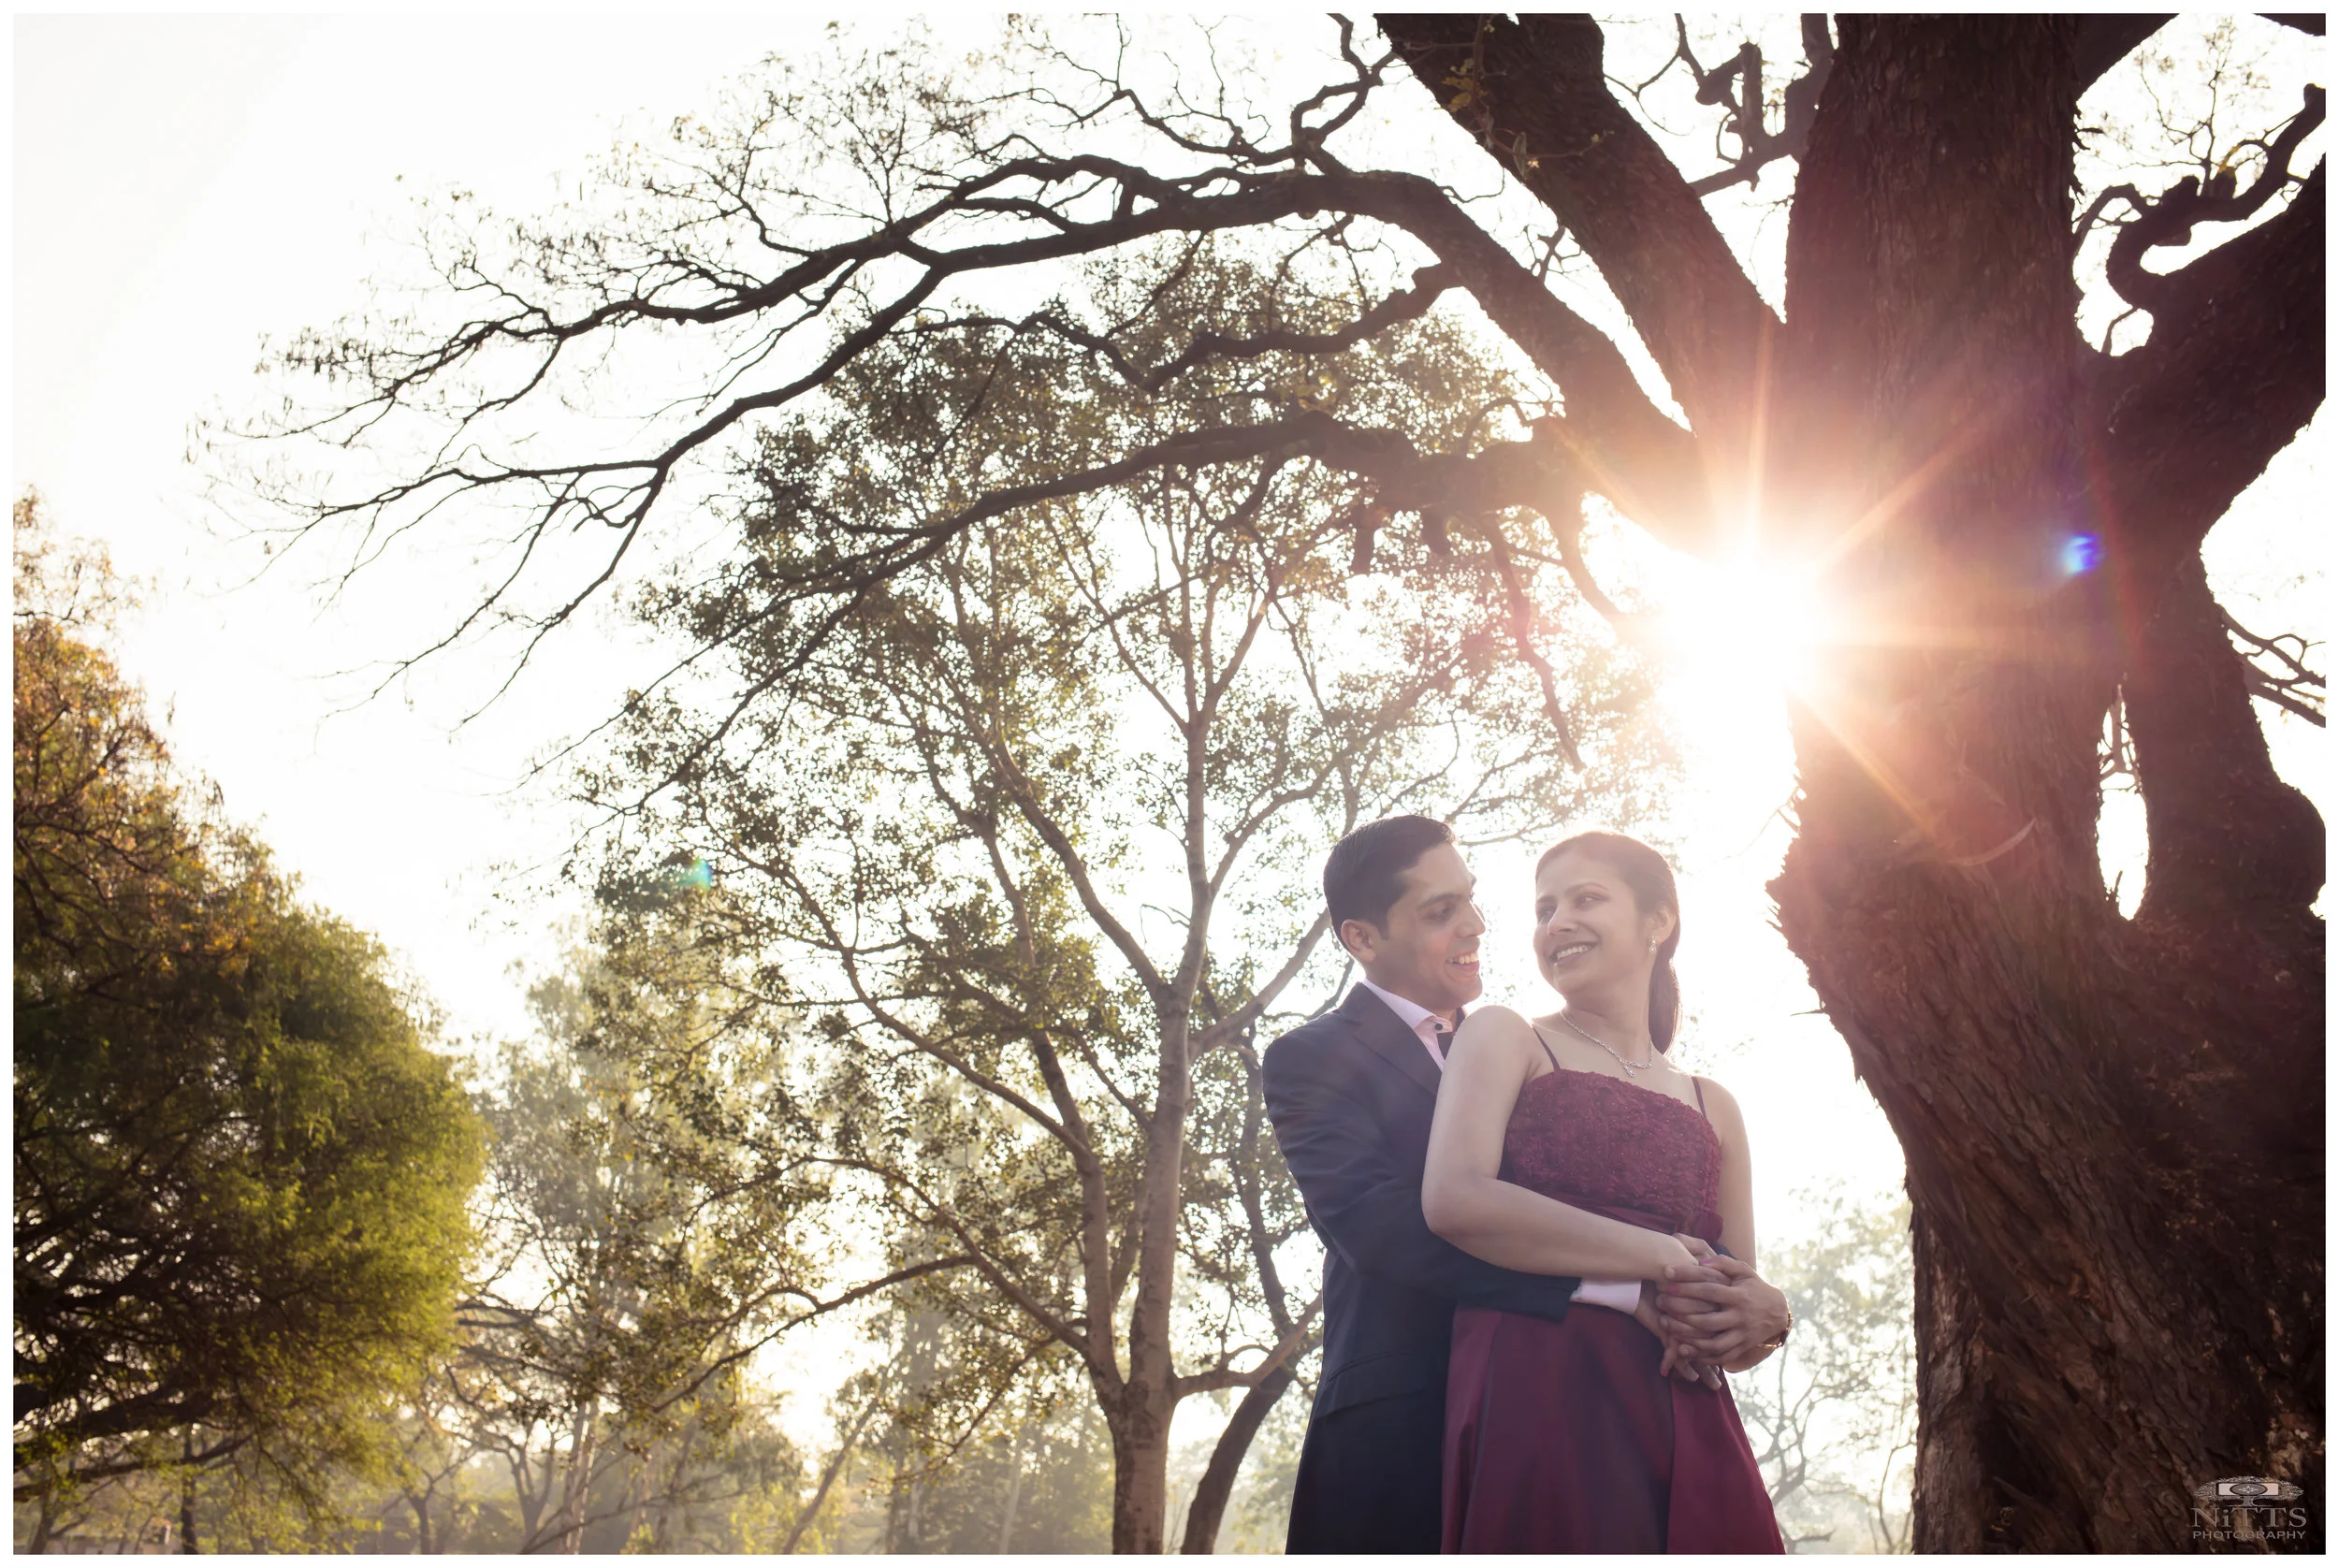
Flares are caused by bright and harsh light sources that reach the lens. One can work to make these flares part of your image artistically. These flares if done right can set the mood and create a perspective with respect to light source. You should be careful that these flares do not distract from the main subject but actually draw towards it.
Diffuse and reflect light
Sometimes we don’t have choice but to shoot in a location with extremely harsh lighting. While we just discussed above how flares can help in creating beautiful imagery but it can also be distracting and might even blow out your subject. So if the flares are not part of your artistic vision then you can filter the natural light by either using a lens hood, an umbrella, or take advantage of the shade from tall grass or trees to avoid glaring flares and block out unnecessary light that the sensor shouldn’t be receiving.
On the other hand, finding yourself in short supply of light for your subject can also be the worst scenario for a photographer. This typically happens in back-light photography when the background overpowers the face of the subject and the latter ends up with harsh shadows or, worse, becomes a silhouette.
You can brighten areas with deep shadows with the aid of a reflector. Hold it up facing the light source and slowly adjust the angle until the right amount of natural light is reflected towards your desired area and the subject is properly lit.

Change your perspective
You don’t have to shoot from just one shooting position. Understanding how the light can work with and for you gives you the freedom to move around and capture your subject in different perspectives. Go ahead and take photos from different angles the next time you shoot against the light. After all, changing your position can help you figure out the best and most flattering lighting angles for your subject.

Spot meter for face
Metering is an important part of getting a backlit shot right. When you shoot in matrix or evaluative metering mode, the camera takes into account the light of the entire frame. In that case, because of the light streaming from the back, your subject will be darker than the background. Using spot metering will get you the right exposure for the subject’s face and skin tone. Now when you spot meter for face, the background will be blown out. So first spot meter for face, and then adjust the exposure by a few stops so as to balance the background with the subject then use reflector or fill light.
The flash will give you the option of lighting up the subject’s face with the angle and power that you want. So the flash acts as a supplement to the natural light. You can even use a reflector to add light to the subject’s face. Hold it and adjust until the right amount and intensity of light are reflected on your subject’s face.

Avoid open sky behind your subject
Open sky is great behind YOU, but not so great behind your subject. If you are properly exposing for your subject’s skin tones, that sky will blow out and be nothing but one big, ugly, distracting white blob in your photo that will steal attention from your subject. Especially if you do not have powerful strobe to overpower sun. Remember, our eyes settle on the brightest thing in a photo. You don’t want that to be a blown out sky. In the below image I have purposefully placed the couplein such a way that neither the sky nor the wall facing Sun is in front of the image.

Create dramatic Silhouettes
Silhouettes are a wonderful way to convey drama, mystery, emotion and mood to the viewers of your photos and often stand out in an album because of the combination of their simplicity but also the story that they convey. I love them because they don’t give the viewer of a clear picture of everything but leave part of the image up to their imagination to wonder about.
The basic strategy you’ll need to employ in taking silhouette shots is to place your subject (the shape you want to be blacked out or under-expose) in front of some source of light and to force your camera to set its exposure based upon the brightest part of your picture (the background) and not the subject of your image.
In doing this your subject will be under exposed (and very dark, if not black). It’s individual and artistic vision whether you want it to be completely black or just under exposed with some visibility.

Use seasonal elements
The landscape changes according to the season and an intelligent photographer embraces seasonal challenges and use it for it’s own advantage. A portrait captured in the rain will always evoke the memory of the same for the couple.
